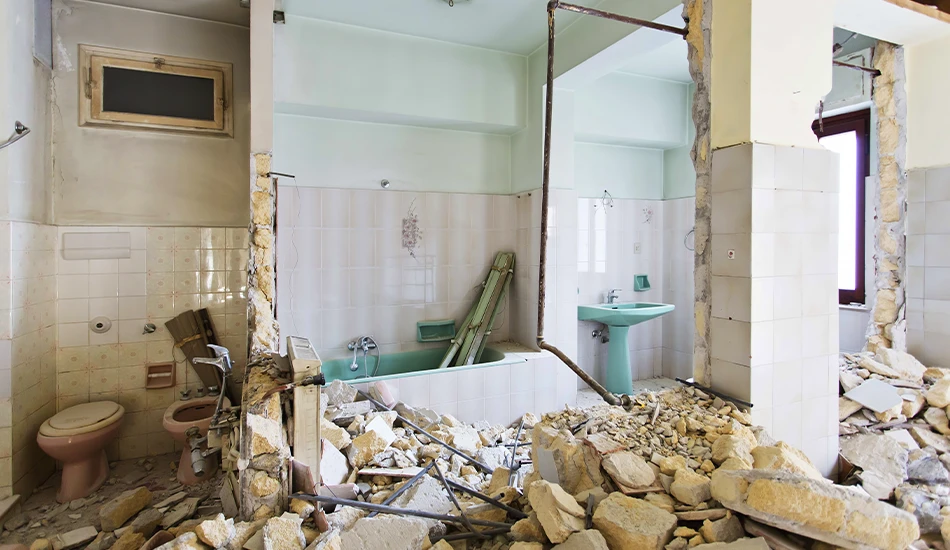
You’re looking to renovate your bathroom, but you need to demo it first.
Whether you’re prepping the area for your remodeling contractors, or working on a full DIY remodel, you’re in the right place.
As Class A licensed providers of bathroom remodeling in Richmond, we’re here to tell you how to get the job done right.
Here’s a step-by-step guide on how to demo a bathroom for renovation.
1. Get Your Dumpster or Trash Bags

The first thing you’ll need is a plan for getting rid of all the demoed contents.
For larger projects, we suggest renting a dumpster. Most bathroom demos will need at least a 10-yard dumpster, which typically runs $250-400 for a week rental. Pro tip: place plywood under the dumpster to protect your driveway.
For smaller projects, you can get away with bagging things up and taking them to the local landfill. Be sure to get the heavy-duty 3mm contractor bags – standard kitchen bags aren’t strong enough. Make sure to call your local transfer station first – some don’t accept bathroom fixtures like toilets and tubs, or may have special drop-off times for construction debris.
2. Gather Tools & Supplies
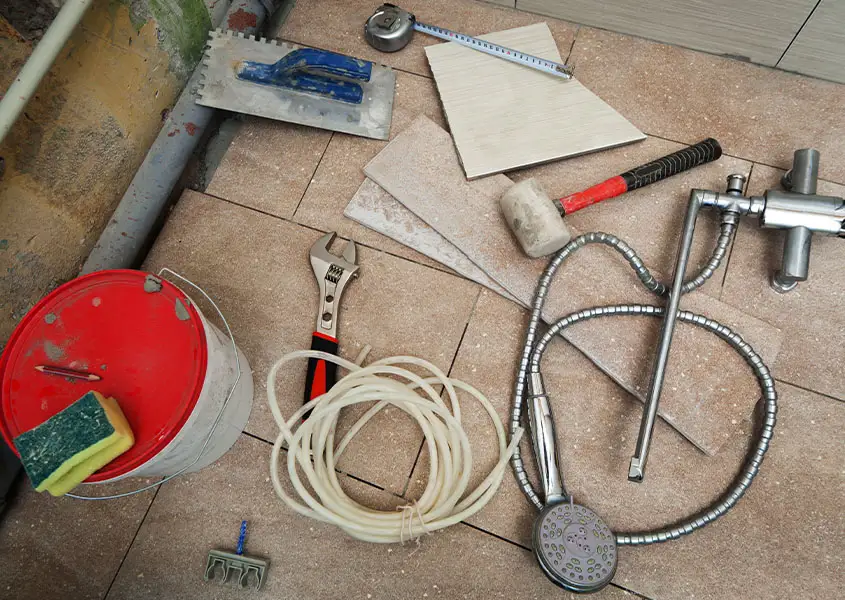
Now that your means for disposal is in order, you’ll need to get your tools and supplies lined up.
Here are the main things you’ll need:
Tools
- Pliers – To grip and remove small fixtures.
- Oscillating Multi-Tool – For precise cutting and sanding.
- Reciprocating Saw – To cut through tough materials like pipes and studs.
- Crowbar – To pry up flooring, trim, and nails.
- Screwdriver – To remove screws from fixtures and hardware.
- Utility Knife – To cut caulk, drywall, and tape.
- Adjustable Wrench – To loosen or tighten plumbing fixtures.
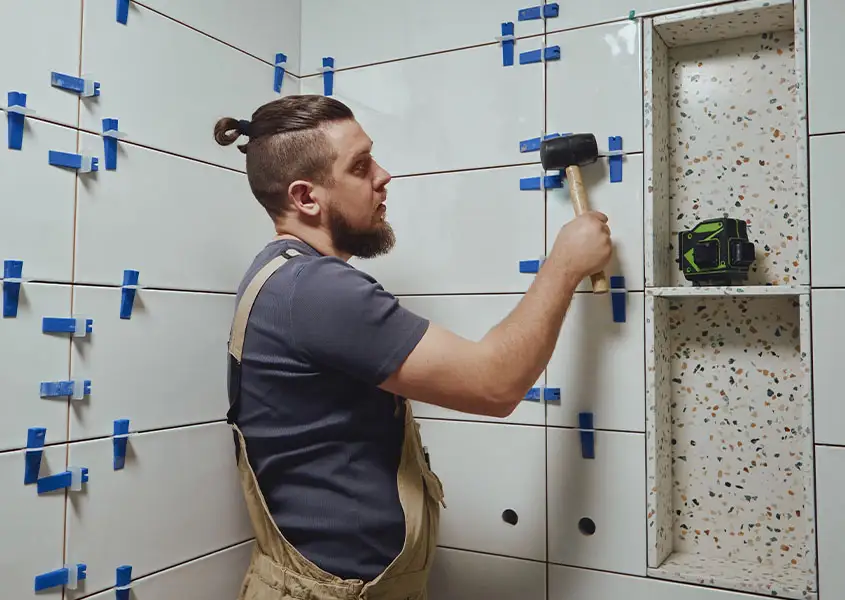
- Laser Level – To ensure accurate alignment during installation.
- Mallet – To tap materials gently without damaging them.
- Buckets – To collect debris or water spills.
- Ladder – To access higher areas like light fixtures or ventilation.
- Hammer – To remove nails and break materials.
Supplies
- Plastic Sheets – To protect surfaces from dust and debris.
- Drop Cloths – To protect floors from damage and spills.
- Shop-Vac – To clean up dust and small debris.
- Contractor Trash Bags – To handle heavy debris without tearing.
- Duct Tape – To secure plastic sheets or temporary fixes.
- Painter’s Tape – For marking or masking edges during painting.
- Dust Mask – To prevent inhaling dust and particles.
- Safety Goggles – To shield eyes from debris.
- Heavy-Duty Work Gloves – To protect hands from sharp edges.
- Sturdy Work Boots – To shield feet from heavy objects.
- WD-40 – To loosen stuck bolts or screws.
- Long-Sleeved Shirt and Durable Pants – To prevent scratches and minor injuries.
- Knee Pads – To protect knees during floor work.
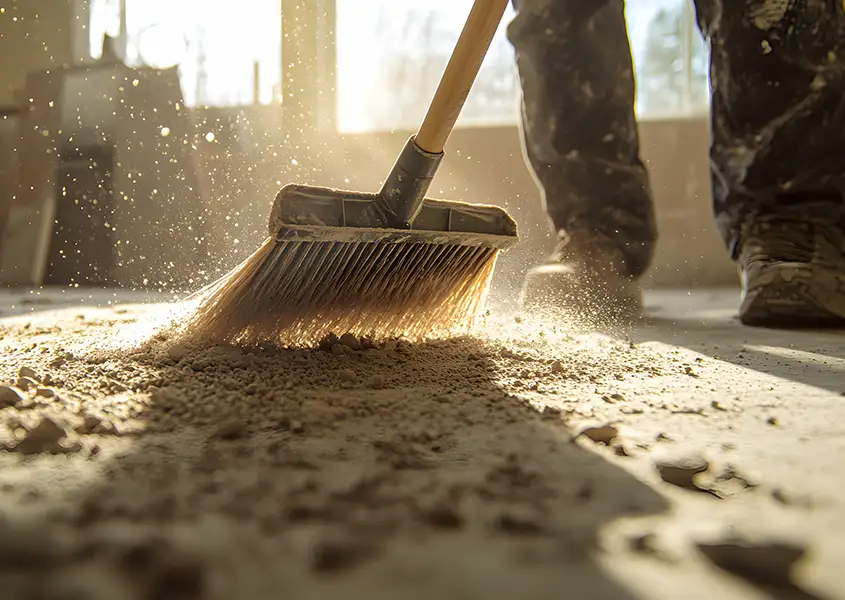
- Broom – To sweep up loose debris quickly.
- Trash Can – For organizing waste during demolition.
3. Prep the Area
We’re almost ready to get down to it, but first we need to get everything tidied up for a smooth and safe workspace.
As the (very cliché) saying goes, “Measure twice, cut once”.
Here’s how to set the job up for success:
- Clear out the space completely
- Empty the bathroom of everything that’s not nailed down, including toiletries, towels, and rugs.
- Remove loose items from drawers, cabinets, and shelves.
- Relocate removable storage like freestanding cabinets or shower caddies to a clean area.
- Discard expired products and donate anything in good condition you no longer need.
- Protect non-work areas
- Seal vents and registers with plastic sheeting and duct tape to block airflow.
- Protect adjoining floors with heavy-duty drop cloths, tarps, or flattened cardboard.
- Shield fixtures and surfaces like countertops or sinks with foam or old towels.
- Ensure proper ventilation
- Open windows and doors to let fresh air in and dust out.
- Use a box fan or portable fan aimed out a window to actively expel dust from the room.
- Turn on the bathroom exhaust fan, if available, to help pull air out.
- Shut off utilities thoroughly
- Water: Turn off individual fixture valves or the main water supply. Drain faucets, flush the toilet, and clear any leftover water.
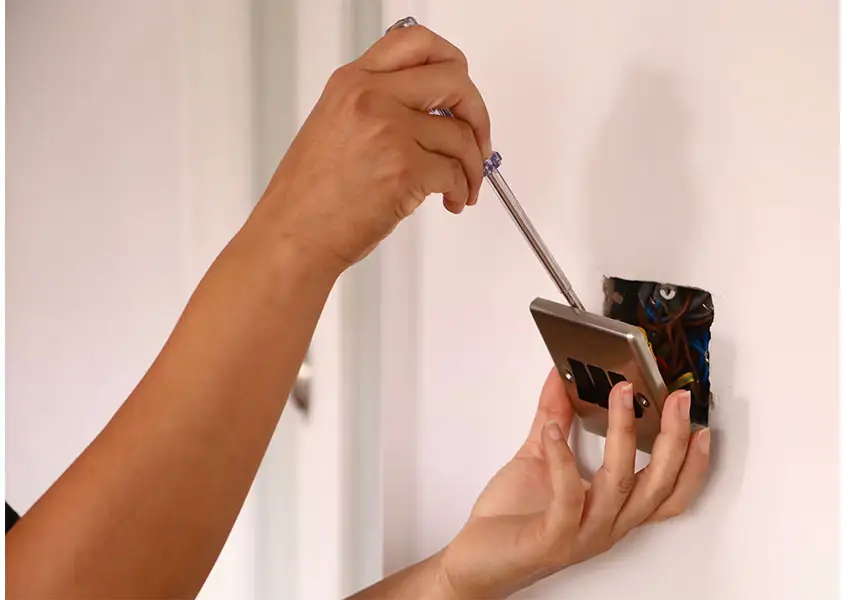
- Electricity: Switch off the breaker for the bathroom circuit and test outlets or switches with a voltage tester.
- Prepare the walls and fixtures
- Take down mirrors, shelves, towel racks, and hooks. Wrap fragile items in padding for storage.
- Tape plastic sheeting over light fixtures and outlets to protect them from dust.
- Seal the doorway and contain the mess
- Hang a plastic sheet or install a zipper dust barrier over the doorway to keep debris contained.
- Secure edges with painter’s tape to prevent dust from escaping.
- Safety check the workspace
- Organize tools, safety gear, and debris-handling materials in designated spots to reduce clutter.
- Identify potential hazards like slippery areas or sharp edges and address them before starting.
- Ensure fans are securely placed and out of the way to avoid accidents.
4. Remove Accessories & Smaller Fixtures
Now that the area’s prepped and primed, we’re ready to get down to business.
It’s time to remove some of the smaller stuff that’s screwed in. Specifically:
- Towel racks – Unscrew and store safely if reusing.
- Shelves – Remove brackets and any caulk securing them.
- Hooks – Unscrew or gently pry off adhesive-mounted hooks.
- Mirrors – Use a heat gun to soften adhesive before prying off glued mirrors. Wrap in padding for storage.
- Light fixtures – Disconnect wiring and cover exposed wires with wire nuts.
- Vent covers – Unscrew and clean if they will be reused.
- Curtains, rods, and blinds – Take down and relocate out of the workspace.
Be sure to store reusable items in a safe location and label screws or brackets for easy reassembly later.
5. Demo Plumbing Fixtures
Now it’s time to dive into the real work of bathroom demolition—removing the plumbing fixtures. Toilets, sinks, vanities, and bathtubs take center stage here, and this is where the heavy lifting begins. Some of these fixtures can be removed intact if they’re in good condition and you plan to reuse or donate them, but most will need to be demoed for easier disposal. Let’s tackle each one with care and precision to avoid damaging nearby walls, floors, or pipes.
Removing the Toilet
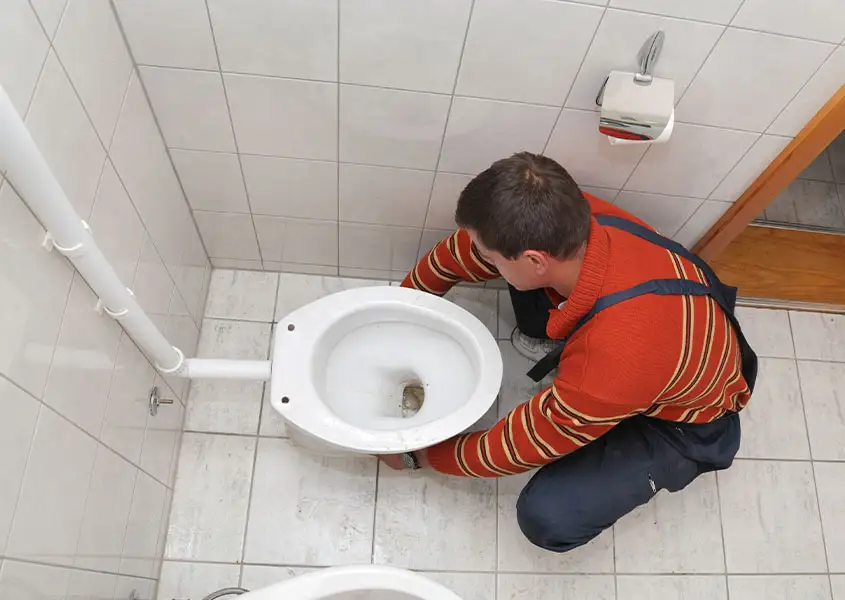
Double-check that the water supply to the bathroom is off. Flush the toilet to ensure the tank and bowl are as empty as possible, and use a sponge or wet/dry vac to remove any remaining water. This step ensures no spills during removal.
Disconnect the inlet pipe from both the tank and wall valve using an adjustable wrench. For a two-piece toilet, remove the tank first by unscrewing the bolts securing it to the base and lifting it away. Set the tank aside. For a single-piece toilet, skip this step and proceed to the base removal.
Use a utility knife to cut through any caulk sealing the toilet base to the floor. Unscrew the bolts securing the toilet to the flange, then carefully lift the entire unit free. Place the toilet on a tarp or in a heavy-duty contractor bag to minimize mess. Finally, scrape away the wax ring from the flange with a putty knife and block the drain hole with a rag to prevent sewer gases from escaping.
Demoing the Sink
Double-check that the water is off to the bathroom, and place a bucket under the P-trap to catch any water left in the pipes. Loosen the slip nuts on the P-trap and disconnect it from the sink and wall pipe.
Next, unscrew the water supply lines with an adjustable wrench. Be prepared for a small amount of water to spill when disconnecting. For a drop-in sink, use a utility knife to cut through any caulk sealing it to the vanity top. If the sink is wall-mounted, unscrew or unbolt it from the wall brackets.
Once disconnected, lift the sink out carefully. Wall-mounted sinks can be particularly heavy, so enlist a helper if needed. Transport the sink to your disposal area or store it safely if you plan to reuse it.
Removing the Vanity
Vanities can be bulky and often require some disassembly for easy removal. Begin by cutting through any caulk securing the vanity to the wall or floor. Check for screws or nails anchoring the unit to the wall studs, and remove them with a screwdriver or drill.
If the countertop is separate, detach it first by prying it up gently with a crowbar or cutting through the adhesive with a utility knife. Then, remove the base of the vanity, ensuring no plumbing connections remain attached.
Break down the vanity into manageable sections if it’s too large to move in one piece. Transport the debris to your dumpster or designated disposal area, being careful not to damage surrounding walls or flooring during removal.
Demoing the Bathtub or Shower

Double-check that the water supply is off and ensure no fixtures are still connected. Begin by removing faucets, handles, and drain covers. Use a sponge or bucket to remove any standing water from the basin.
Cut away the drywall surrounding the tub or shower to expose the edges and attachment points. Be cautious not to cut into studs or plumbing lines. If screws secure the tub or shower to the wall, remove them with a drill or screwdriver.
For large units, cutting is often the best option. Use a reciprocating saw or jigsaw to divide the tub into smaller, more manageable pieces. Start by cutting it in half, and make additional cuts if necessary for easier transport. Carefully pry the pieces away from the wall using a crowbar, and work with a partner to carry them out safely.
6. Demo the Flooring and Walls
Once the fixtures are out and the space is cleaned up, it’s time to tackle the flooring and walls. This part of the demo can be the most physically demanding, but it’s also a crucial step in preparing for your new design. Whether you’re replacing tile, subflooring, drywall, or all of the above, here’s how to handle it effectively.
Removing the Flooring
Start by assessing the type of flooring you’re dealing with—tile, vinyl, or laminate—and gather the appropriate tools. For tile, use a hammer and chisel or a floor scraper to pry up the tiles. Begin at an edge or seam and work methodically across the room. A pry bar can help lift stubborn tiles.
For vinyl or laminate, start by cutting the material into manageable strips using a utility knife. Pry up each section with a floor scraper or crowbar. Check for adhesive residue and use a scraper or adhesive remover to clear the subfloor.
Once the surface material is removed, inspect the subfloor for damage. If it’s warped, rotted, or uneven, it will need to be replaced to create a stable base for your new flooring.
Demoing the Walls
If you’re replacing or modifying the walls, start by cutting away the drywall or plaster. Use a utility knife to score along seams or edges to control dust and debris. A reciprocating saw can speed up the process but be cautious around plumbing and electrical lines.
Remove drywall in large, manageable sections by pulling it away from the studs with a crowbar. For plaster, use a hammer to break it up into chunks, then scrape away any remaining lath.
For tiled walls, begin by chipping away tiles with a hammer and chisel, starting from the top corner. Once a few tiles are removed, insert a pry bar to peel away sections more efficiently. Be mindful of dust and debris—this process can get messy fast.
6. Clean Up the Space
Demolition can leave behind a lot of dust, debris, and potential hazards. Before moving on to the exciting part of rebuilding, take the time to properly clean up the space. This ensures a safer and more efficient start for the next phase of your renovation.
Clear Out All Debris
Start by gathering all large pieces of debris, such as broken tiles, drywall, or fixture parts. Place them directly into your dumpster or heavy-duty contractor bags for disposal.
Use a broom or shovel to collect smaller fragments and loose materials from the floor.
Vacuum the Space Thoroughly
Use a Shop-Vac to remove fine dust from floors, walls, and corners. Pay special attention to areas around plumbing fixtures and electrical outlets where debris might accumulate.
Run the vacuum over vents or registers if they weren’t sealed during prep.
Wipe Down Surfaces
Use a damp cloth or sponge to wipe down walls, countertops, and any other surfaces exposed to dust during demo.
If there’s residue from caulk, adhesive, or paint, consider using a specialized cleaner or scraper to remove it completely.
Inspect for Leftover Hazards
Double-check for stray nails, screws, or sharp fragments that could cause injury later.
Ensure that all tools, cords, and equipment are stored neatly to avoid tripping hazards.
Dispose of Waste Responsibly
If you’ve rented a dumpster, ensure that it’s filled within its weight limit and ready for pickup.
For bagged debris, confirm your local landfill or transfer station accepts construction waste and follow their disposal guidelines.
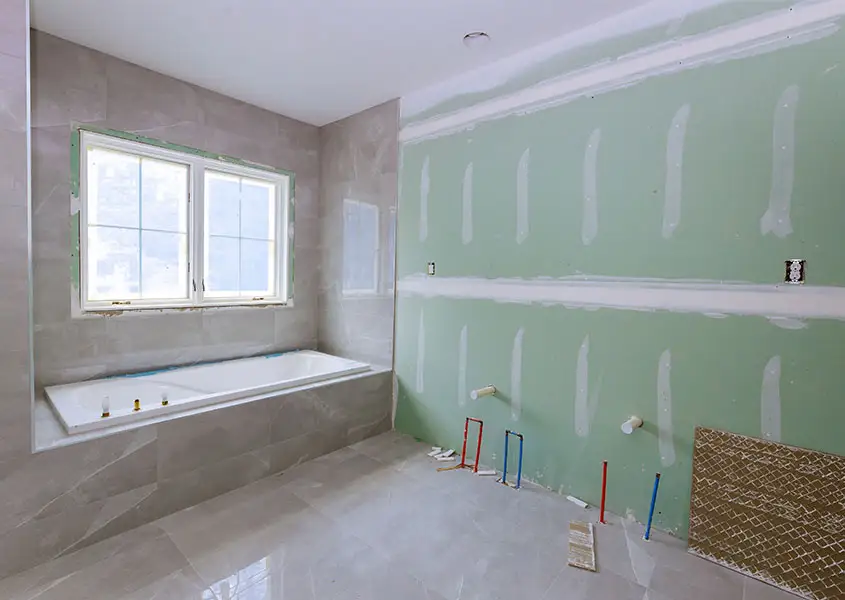
Wrapping It Up

With everything stripped out and cleaned up, you now have a blank canvas for new installations and a fresh start for your renovation.
Now crack a refreshment and take a breather from the hard work. The remodeling portion can wait a bit.
The Bottom Line
Demolishing your bathroom is a big first step toward creating the space you’ve been dreaming about. It starts with careful prep, clearing out smaller items, and shutting off utilities. Then you’ll move on to removing accessories, demoing the plumbing fixtures, tackling the tile and walls, and finishing with a thorough cleanup. With all that behind you, you’ve cleared the way for something fresh and functional.
If you’re going the DIY route, take the time to plan carefully and budget for the unexpected. Some parts of the project might be outside your comfort zone—like plumbing or electrical work—and that’s okay. Knowing when to call in the pros can save you a lot of stress (and potential do-overs).
For those who’d rather skip the hassle and let someone else handle the heavy lifting, working with a trusted contractor can give you peace of mind. They’ll make sure the job is done right and to code, so you can focus on enjoying the finished product.

If you’re in the Richmond, VA area, let us over at G2 Renovations help. As licensed Class A contractors, we specialize in creating bathrooms that are not only functional but also beautiful. Whether you need a full remodel or just help with the tricky parts, we’ll bring your vision to life.